Mending a steam engine
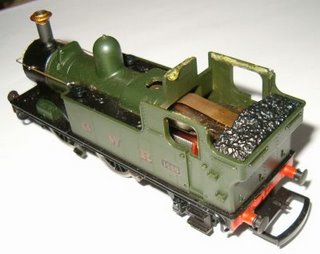 I bought this tank engine on e-bay. It was cheap, largely because it had a few bits missing and didn't go. But never mind, I thought, I can have a go at fixing it. I have another engine just like it which I can use as a 3d template; all I had to do was make the missing buts just like the original. Should be a nice easy project for a first attempt at scratch-building, I thought.
 The first and most obvious thing which was missing is the cab. After careful measuring and drawing a diagram on paper, I cut out the back of the cab from 30 thou plasticard. This was easier than I thought: I've not worked with plasticard before, but it cuts easily (with a Stanley knife or craft knife) and glues together very solidly with normal polystyrene cement. The 10 thou sheet cuts even better with scissors.
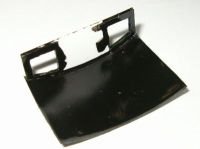 After that I made the roof. This was a little harder because it was curved. I made this out of two identical layers of 20 thou plastic card - just rectangles. I curved them by running them around the shaft of my craft knife until they were just the right curvature, then glued them together. My thinking was that the glue holding them together would stop them uncurving, and keep the shape. That worked pretty well; on the down side, you can see it's made from two layers, but filing down the edges and painting helped a bit.
 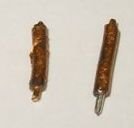 The next bits to tackle were the whistles and the whistle guard behind them. The whistles are pretty low-tech: two pieces of single-strand plastic-coated wire, partly stripped, and painted with brass-coloured paint. I tried cutting lines into the plastic to make rings around the whistle, but not successfully - maybe later. Still, they look ok from a distance.
 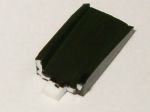 The whistle guard is just made from three bits of plastic card: 40 thou for the sides and 30 for the back, which has to fit into a little hole in the boiler. None of them are quite rectangular, the back gets wider as it goes up, and bends, and the sides get narrower. It matches my other train pretty well, but I think the real thing should have been thinner. I suppose I could have another go, it wasn't that hard!
 I chickened out and bought the safety valve cover from a local model shop. I think it needs something inside it, though - a job for google image search.
 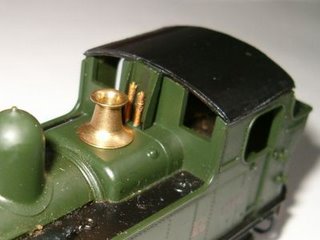 So far so good on the bits. Painting them was a little harder: some of the paints seem to work better on the plastic card than others. (I might try spray-painting an undercoat next time). The roof is "anthracite" (sem-shiny) black (I don't have any matt). It looks ok IMO, just well-polished. It's a bit thin in places, though, and needs another coat. I also used the anthracite to undercoat the cab back and whistle guard (the white bit on the back is because I needed something to hold on to).
 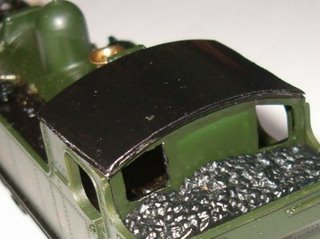 Then I got a pot of "GWR post 1928 engine green" to go over the top, which perhaps unsurprisingly is a perfect match. It went on much better where I'd undercoated; the bits which I missed (cab back) need another coat. I don't think I've really got to grips with painting yet (a worse disaster will feature in a future article), but you learn by trying things out.
 That was a while ago, since then I've re-written this to make it a bit shorter but still haven't stuck the bits together! I did take some photos of them in place though. I'm quite pleased with it: it's not the real thing but looks ok from a distance.
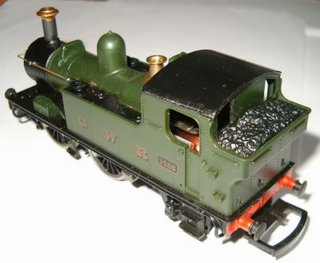 So, more painting needed, then I'll tackle the handrails, all of which are missing. And at some point I'll have to commit myself by sticking it all together. But it's been a fun project. Hopefully there will be a sequel to this post at some point when I get the chance!
For those who don't know and are interested, the engine is a Great Western Auto Tank; it was the prototype for "Oliver the Western Engine" in Thomas and Friends. These small tank engines were used on branch lines, where they would push a handful of coaches up and down collecting a handful of passengers. That was back in the days before uneconomical branchlines were closed and uneconomical steam engines were scrapped. Long before I was born. I saw a real one when we were on holiday in Torquay and it's a nice piece of machinery.

1 Comments:
Cool. I have a train just like this, but I don't think that I would ever get the whole repairs thing going. I think that I might eventually take the trains that don't run so well somewhere to be looked at though.
I liked runnning them round as a kid, and dreaming of how I could one day have a fancier layout. Still, I do have a board which was lovingly put together by my dad, with 3 1/2 circuits, several sidings, and connecting points, so I am better off than the basic setup.
I must confess though, that two of my trains were indeed Thomas and Percy. Got the DVD too (note, this is a DVD of Ringo Star narrated stories from when it was called Thomas the Tank Engine and Friends, not the current drivel). Also, got a few of the books, even a few of pre-TV Railway Series books. Three of them don't even have barcodes!
Anyway, enjoy fixing your engine, hope the finishing touches go well.
Post a Comment
<< Home