Scratchbuilding an engine (first attempt)
In an earlier post I mentioned three spare chassis which I'd got working. What do I do with them? Well, why not build an engine to go on one? I thought about a large-scale Skarloey (from Thomas) but the wheels weren't quite right. So I thought I'd try to build a model of the 14xx's predecessor, the "Wolverhampton 517 class". It could be largely a copy of the 14xx, but with a few different bits where needed. Once again this would mean I had a real 3D prototype to work for most of the time. I've never scratch-built an engine before, but I have the chassis and plastic sheet is cheap, so how far wrong can I go?
 First I measure and cut the floor. This was a rectangle of 30 thou plastic with many bits cut out to fit on the chassis. I actually wanted to use 40 thou, but picked up the wrong sheet :( Next I cut the sides to go beneath it (in the hope of adding some strength). This was also long and complicated to do, as I cut the two tops of the ladders out of the same piece. Sticking these to the top did stop it bending quite so easily. Buffer beams next, simple rectangular ones which nicely stuck to the top and sides.
At this point I had a flat platform which I could put on my chassis. Woohoo. A lot of work and not a lot to show for it. What next, I thought?
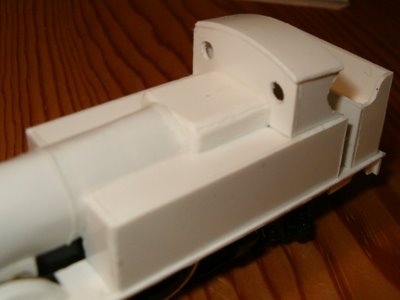
Next, I decided to do the smokebox saddle. This was carefully measured and then inaccurately cut and glued together to make a 3-sided open box. I then made the smokebox itself. This was two rectangles of 10-thou plasticard, rolled into a cylinder, with joins on opposite sides, and glued together. I'd used a similar trick for roofs, but it doesn't work so well on cylindrical objects. Thankfully it fitted nicely onto the saddle I'd already made.
 Giving up on the front for a bit, I cut the bunker out of 40 thou card - nice and strong. The 517 had a straight-backed bunker, so this was very easy to do - only the s-shaped curve at the top of the side caused trouble, and I tidied that up with a round file. The bunker is a simple box, so I cut two rectangles to go inside (one at the bottom and one half-way up) to give it strength. The result looked pretty good and felt very strong indeed.
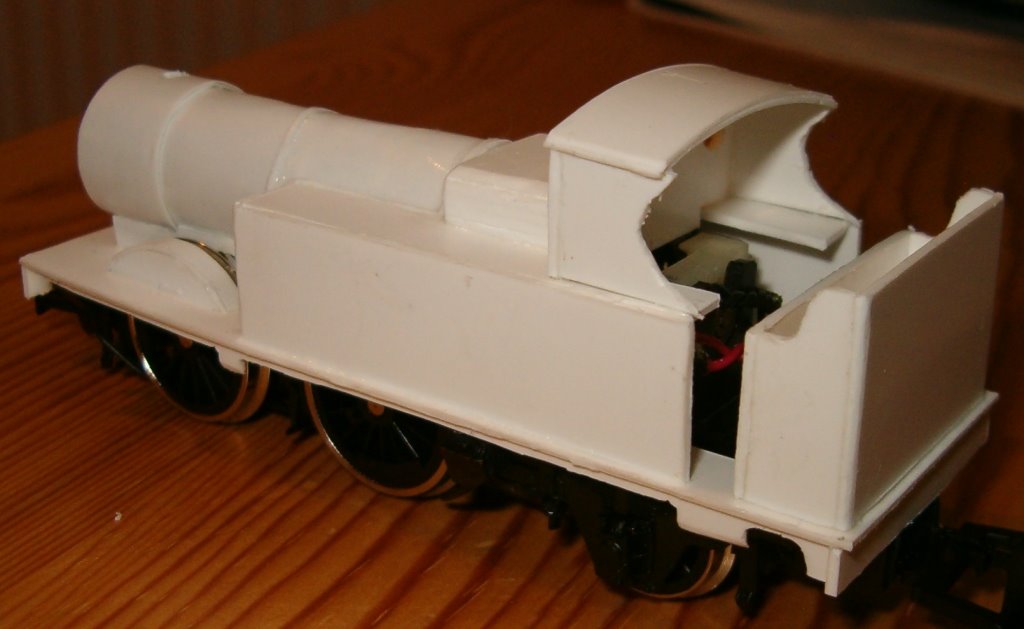
Up until this point I'd worked with two different chassis, the old Airfix one and a newer Dapol one. At this point I realized that I had to reject the older chassis, as its larger motor extended back into the cab so far that I couldn't fit the bunker on. No problem, the newer chassis had a smaller motor which fit fine.
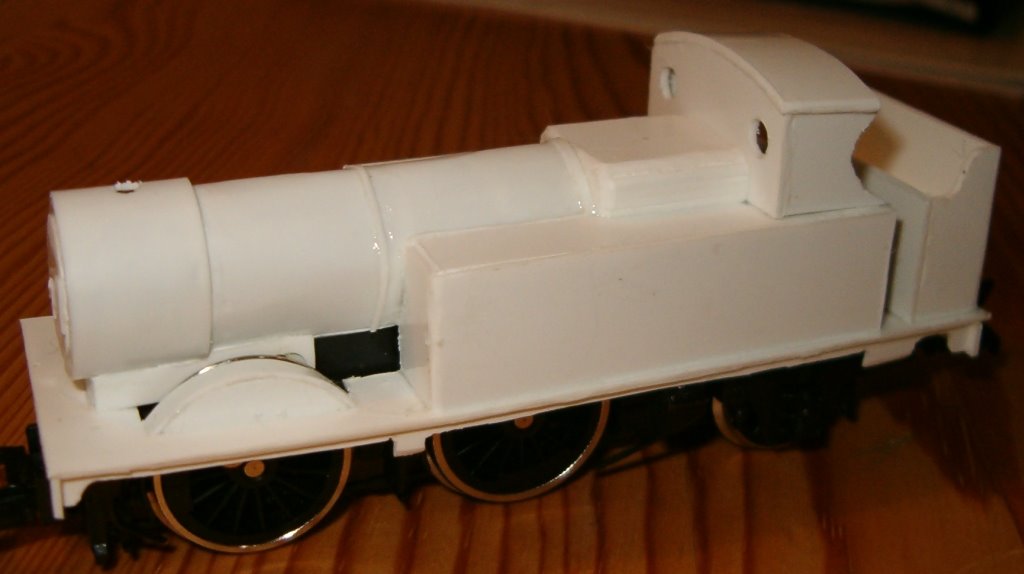
Next I cut out the tanks, using 40 thou for strength. This was quick and easy to do as everything was rectangular; I rounded off the corners with a file, then had to cut a circular hole in the front for the boiler.
 Next I built the boiler itself, using the same method as for the smokebox. It slotted into the smokebox, which has a slightly larger diameter (convenient for modelling). It also slotted into the hole in the boiler, although unfortunately I'd cut that a bit too small and not quite circular :( But when I put the boiler, the firebox, and the tanks together and stuck them to the chassis, something magical happened - it started to look like an engine! I then had to cut out most of the underside of the boiler and part of the smokebox to allow the chassis to fit into place. This was a nervous time as I thought it would fall apart - but no, it seemed still pretty solid. I cut some three arc-shaped braces to go inside the boiler just to be sure.
Next I built the cab. I had two goes at this, as the 517's cab is different from the 14xxs and I didn't have a diagram. The first one was too small, the second one looked much better. I'm still struggling to cut nice flowing curves, though.
 That left a big gap where the firebox should go. This is an awkward shape, with two broad rounded corners and a rounded edge at the front too. In the end I made it out of a big lump (5 40 thou rectangles) and just filed it to shape - clumsy, low-tech, but not bad.
More to come.
 First I measure and cut the floor. This was a rectangle of 30 thou plastic with many bits cut out to fit on the chassis. I actually wanted to use 40 thou, but picked up the wrong sheet :( Next I cut the sides to go beneath it (in the hope of adding some strength). This was also long and complicated to do, as I cut the two tops of the ladders out of the same piece. Sticking these to the top did stop it bending quite so easily. Buffer beams next, simple rectangular ones which nicely stuck to the top and sides.
 At this point I had a flat platform which I could put on my chassis. Woohoo. A lot of work and not a lot to show for it. What next, I thought?
Next, I decided to do the smokebox saddle. This was carefully measured and then inaccurately cut and glued together to make a 3-sided open box. I then made the smokebox itself. This was two rectangles of 10-thou plasticard, rolled into a cylinder, with joins on opposite sides, and glued together. I'd used a similar trick for roofs, but it doesn't work so well on cylindrical objects. Thankfully it fitted nicely onto the saddle I'd already made.
 Giving up on the front for a bit, I cut the bunker out of 40 thou card - nice and strong. The 517 had a straight-backed bunker, so this was very easy to do - only the s-shaped curve at the top of the side caused trouble, and I tidied that up with a round file. The bunker is a simple box, so I cut two rectangles to go inside (one at the bottom and one half-way up) to give it strength. The result looked pretty good and felt very strong indeed.
 Up until this point I'd worked with two different chassis, the old Airfix one and a newer Dapol one. At this point I realized that I had to reject the older chassis, as its larger motor extended back into the cab so far that I couldn't fit the bunker on. No problem, the newer chassis had a smaller motor which fit fine.
Next I cut out the tanks, using 40 thou for strength. This was quick and easy to do as everything was rectangular; I rounded off the corners with a file, then had to cut a circular hole in the front for the boiler.
 Next I built the boiler itself, using the same method as for the smokebox. It slotted into the smokebox, which has a slightly larger diameter (convenient for modelling). It also slotted into the hole in the boiler, although unfortunately I'd cut that a bit too small and not quite circular :( But when I put the boiler, the firebox, and the tanks together and stuck them to the chassis, something magical happened - it started to look like an engine! I then had to cut out most of the underside of the boiler and part of the smokebox to allow the chassis to fit into place. This was a nervous time as I thought it would fall apart - but no, it seemed still pretty solid. I cut some three arc-shaped braces to go inside the boiler just to be sure.
 Next I built the cab. I had two goes at this, as the 517's cab is different from the 14xxs and I didn't have a diagram. The first one was too small, the second one looked much better. I'm still struggling to cut nice flowing curves, though.
 That left a big gap where the firebox should go. This is an awkward shape, with two broad rounded corners and a rounded edge at the front too. In the end I made it out of a big lump (5 40 thou rectangles) and just filed it to shape - clumsy, low-tech, but not bad.
 More to come.
posted by tomdg at 4:17 AM
![]()
![]()

0 Comments:
Post a Comment
<< Home