42xx part II
Still no sign of the wheels I need for the chassis, and my boy keeps prompting me to "put another piece on my engine", so I've added a few more details.
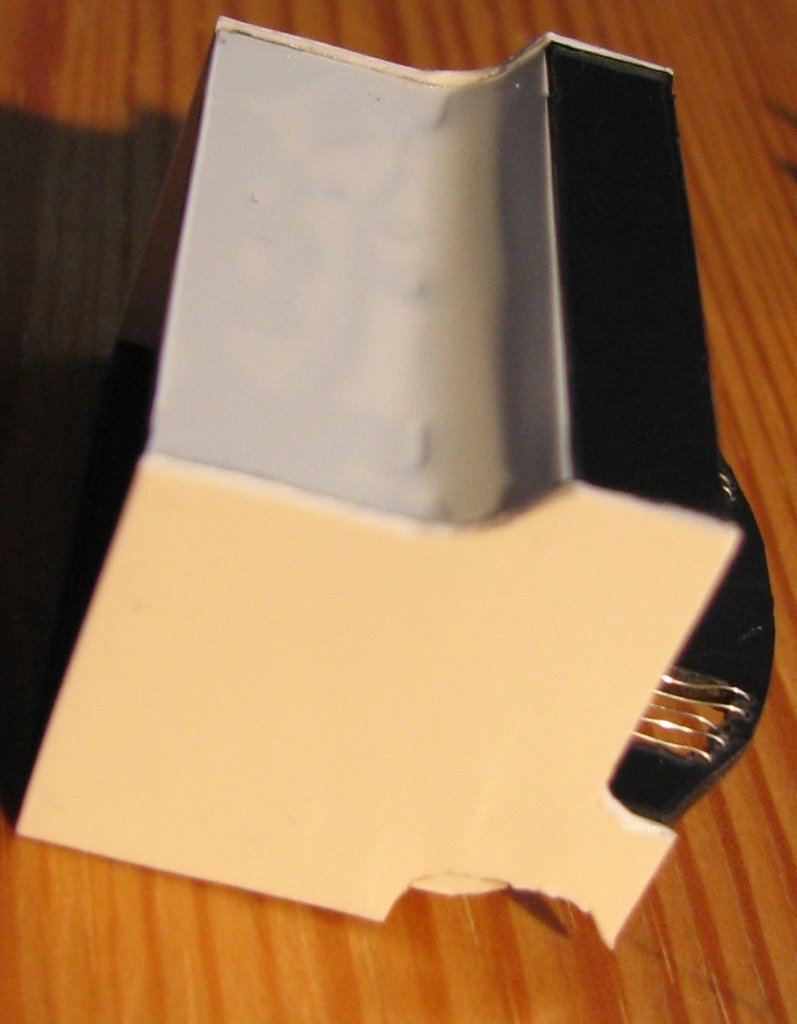
First, I built the bunker and the back of the cab. The hardest part was the curve for the bunker overhang. I made the square bits from thick plasticard, then cut a rectangle of 10 thou and stuck it over the top to form the curve.

I decided this time I'd put grilles on the back window. Very important in real life, otherwise the coal ends up falling into the engine! I made these from a piece of multi-core wire, stripped and split into individual wires (very fine). Then I drilled holes above and below the window with a fine drill bit (0.35mm until I broke it, then .3mm, which I've since lost). The drill action was by hand, since as I mentioned before I don't have a drill. I poked the holes first with a sewing pin to get a headstart.

This was really painstaking work and not worth the result IMO. On the other hand, it would have been easier with a drill, and it would have been easier if I'd started off drilling from the cab side rather than the bunker side. There's an extra line of holes under the right-hand window where I changed plan half-way through and ended up drilling through higher up. You can't see them in the photo because everything's black, and hopefully I can cover them with coal eventually. It would have been easier still if I'd drilled the holes before sticking the cab back in position! Still, it's a nice detail now that I've done it. Must find out where I can buy a micro drill ...

I made two toolboxes to go inside the cab. I cut out the sides from 20 thou, and bent a single piece of 10 thou curved to form the top and front. The lock details were cut from 10 thou as on the 517.

My least favourite part: the firebox. For the 517 I made a rectangle and filed it, but that didn't get the slanted edges which I felt were important on this engine. So I cut out the front and back roughtly, then made two sides, carefully sloped. Finally, the top, slightly bent, and filed at the corners. All made from 60 thou plasticard. The shape is not far off, but I'm not happy with all the gaps. I'll probably fill them with milliput (or polyfilla) later on.

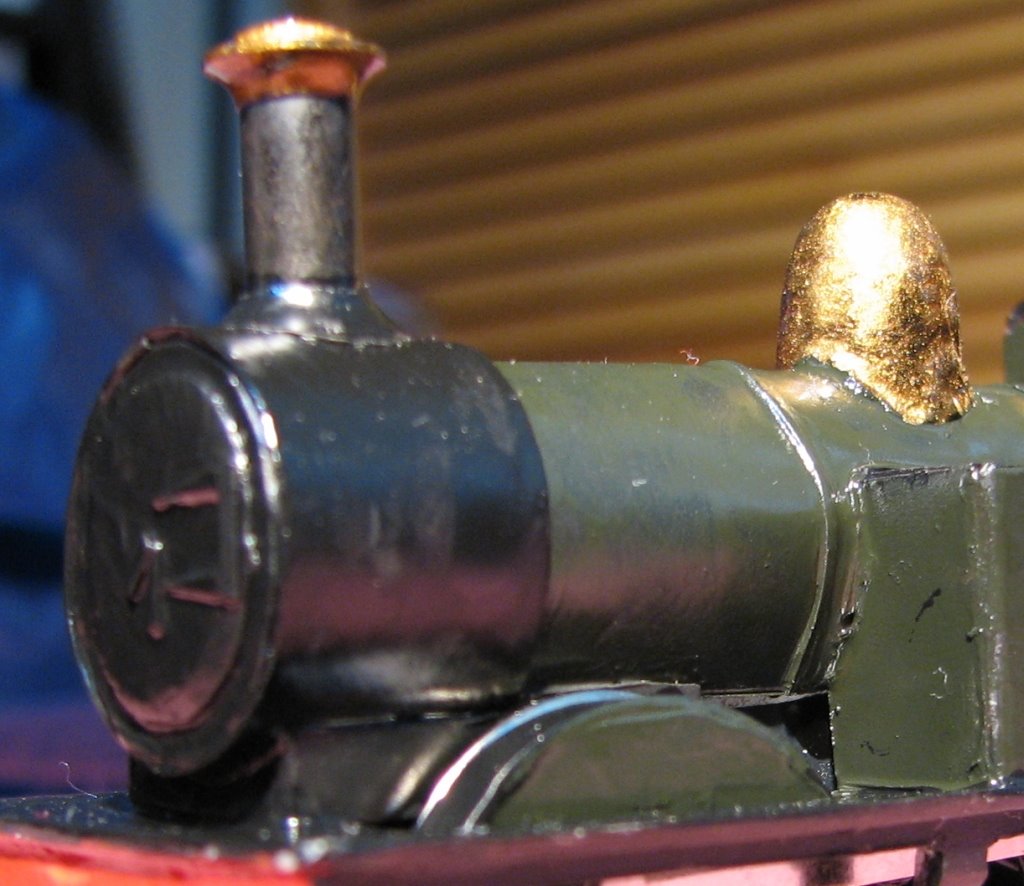
Smokebox door: same process as the one on the 517, just a bit bigger.
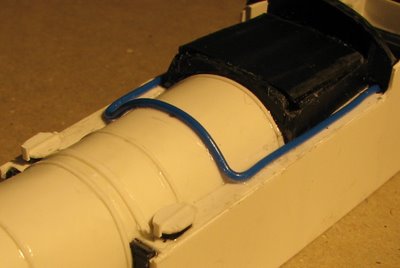
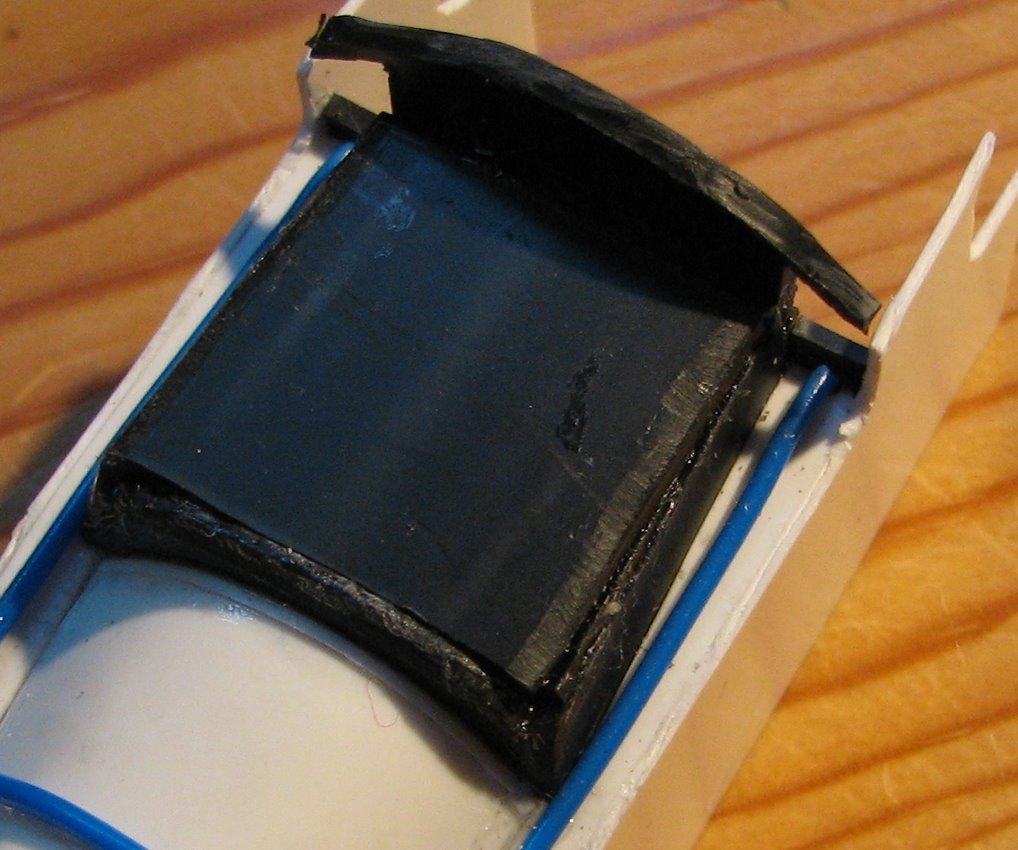
Next, on top of the tanks: a feed pipe, made perhaps slightly over-scale from blue plastic-coated wire, carefully bent to shape, and poked through holes drilled in the tank.
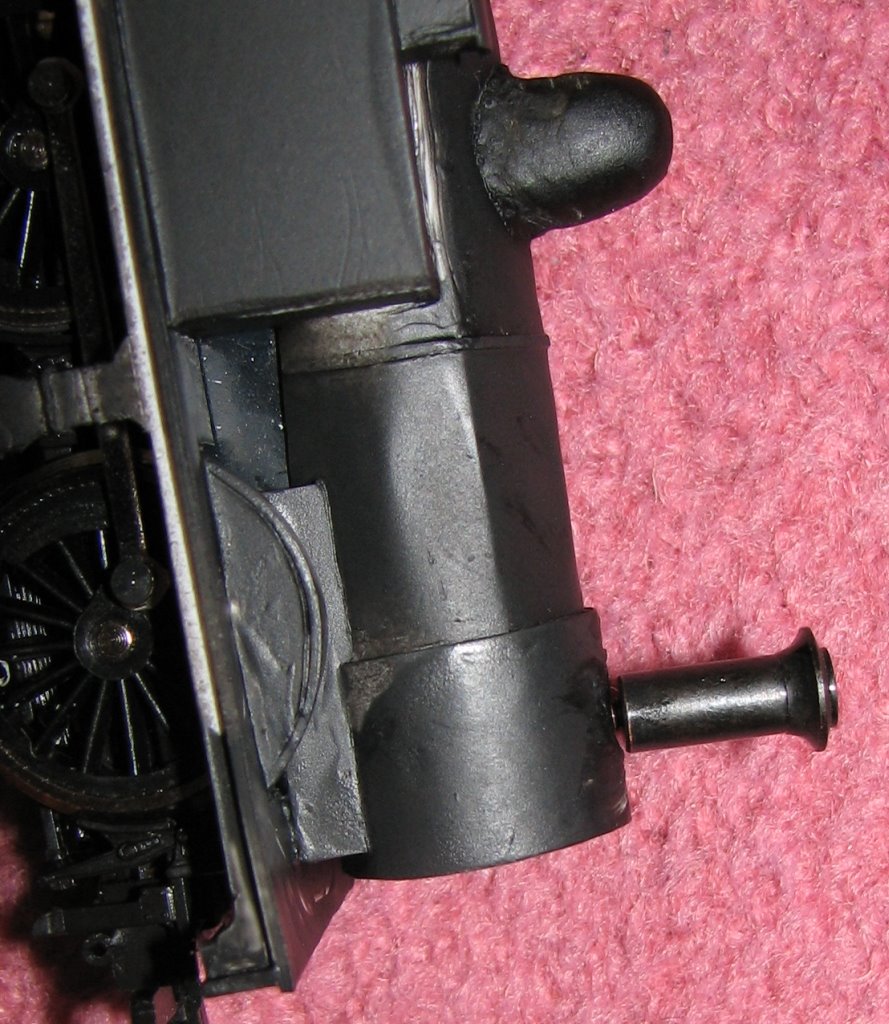
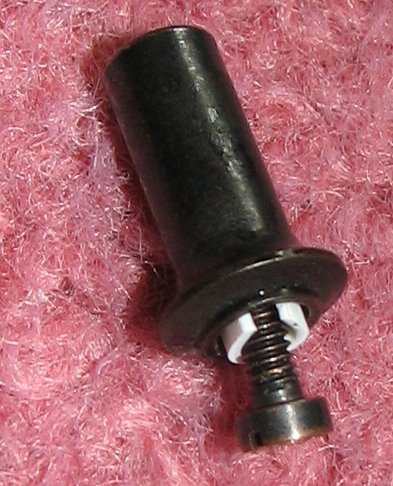
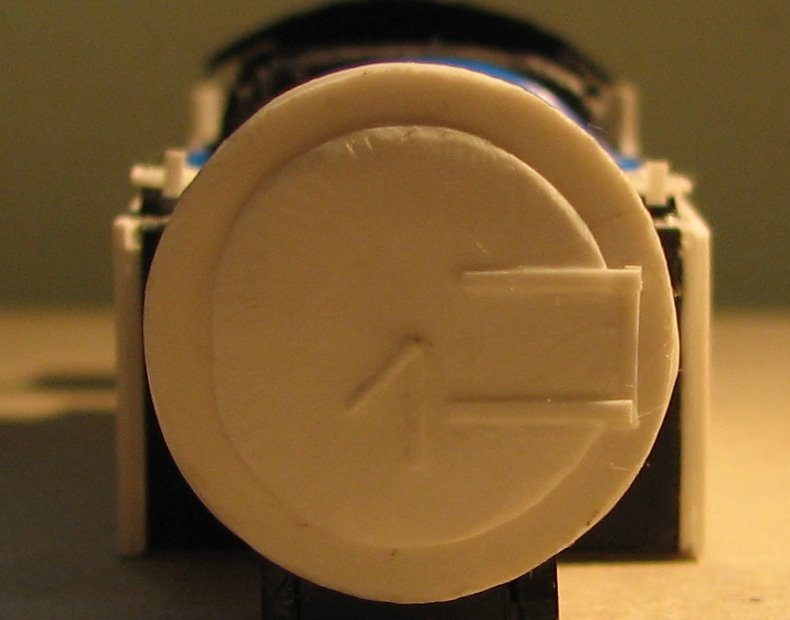
Finally, my favourite: tank filler caps. I'd not done these on the 517 as I thought them too fiddly, but having tried it I've changed my mind. Base cut roughtly to shape from 60 thou plasticard and filed to a rough oval; top cut from 20 thou; details on top cut from slivers of 10 thou. Very nice, I think! Now I have to decide whether to make some for the 517 as well.
First, I built the bunker and the back of the cab. The hardest part was the curve for the bunker overhang. I made the square bits from thick plasticard, then cut a rectangle of 10 thou and stuck it over the top to form the curve.
I decided this time I'd put grilles on the back window. Very important in real life, otherwise the coal ends up falling into the engine! I made these from a piece of multi-core wire, stripped and split into individual wires (very fine). Then I drilled holes above and below the window with a fine drill bit (0.35mm until I broke it, then .3mm, which I've since lost). The drill action was by hand, since as I mentioned before I don't have a drill. I poked the holes first with a sewing pin to get a headstart.

This was really painstaking work and not worth the result IMO. On the other hand, it would have been easier with a drill, and it would have been easier if I'd started off drilling from the cab side rather than the bunker side. There's an extra line of holes under the right-hand window where I changed plan half-way through and ended up drilling through higher up. You can't see them in the photo because everything's black, and hopefully I can cover them with coal eventually. It would have been easier still if I'd drilled the holes before sticking the cab back in position! Still, it's a nice detail now that I've done it. Must find out where I can buy a micro drill ...
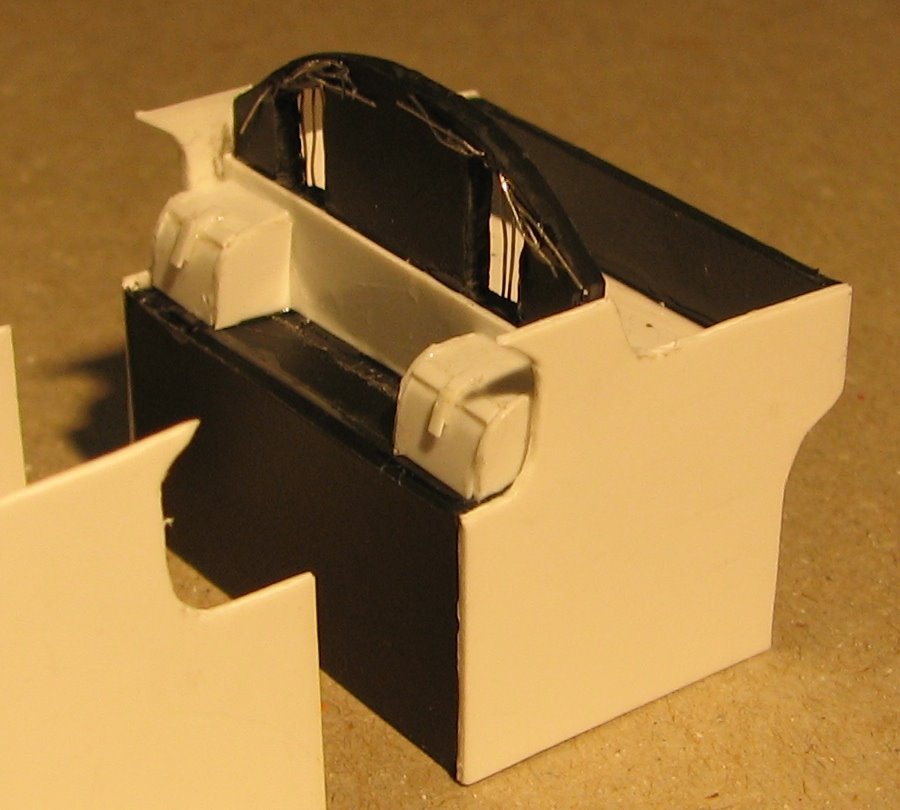
I made two toolboxes to go inside the cab. I cut out the sides from 20 thou, and bent a single piece of 10 thou curved to form the top and front. The lock details were cut from 10 thou as on the 517.
My least favourite part: the firebox. For the 517 I made a rectangle and filed it, but that didn't get the slanted edges which I felt were important on this engine. So I cut out the front and back roughtly, then made two sides, carefully sloped. Finally, the top, slightly bent, and filed at the corners. All made from 60 thou plasticard. The shape is not far off, but I'm not happy with all the gaps. I'll probably fill them with milliput (or polyfilla) later on.
Smokebox door: same process as the one on the 517, just a bit bigger.
Next, on top of the tanks: a feed pipe, made perhaps slightly over-scale from blue plastic-coated wire, carefully bent to shape, and poked through holes drilled in the tank.

Finally, my favourite: tank filler caps. I'd not done these on the 517 as I thought them too fiddly, but having tried it I've changed my mind. Base cut roughtly to shape from 60 thou plasticard and filed to a rough oval; top cut from 20 thou; details on top cut from slivers of 10 thou. Very nice, I think! Now I have to decide whether to make some for the 517 as well.
posted by tomdg at 2:18 AM
0 comments
![]()
![]()