Wednesday, May 31, 2006

42xx part one

Since I was pretty happy with the outcome of my scratch-built 517 class body, I started work on the project I'd originally been aiming for: building a GWR 42xx tank engine. These were massively powerful tank engines used mainly on coal trains in South Wales. Nearly 200 were built, but you can't buy one off-the-peg so I thought it would make a really good model.

Unlike the 517, I don't have the benefit of a ready-made chassis on this one. I plan to build my own chassis, but I've not yet got hold of the key bits I need (a motor, gears, and a set of driving wheels), so I decided to do things backwards and build the body first. I'll probably regret this later, but it's only plastic so as I found with the milk wagon, I can always do another (better) one if it doesn't work out.

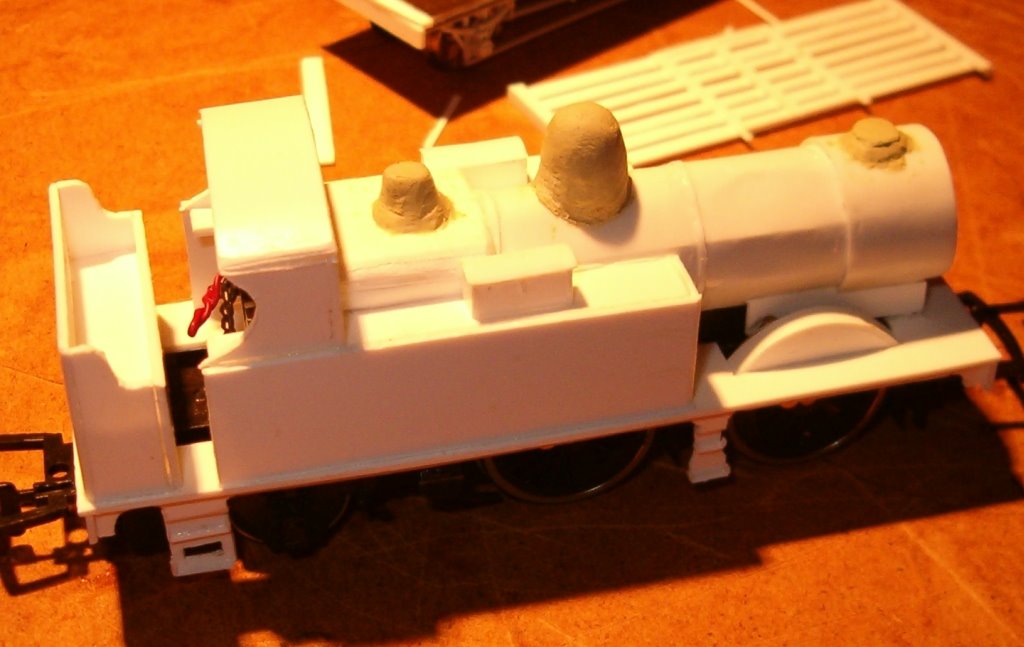
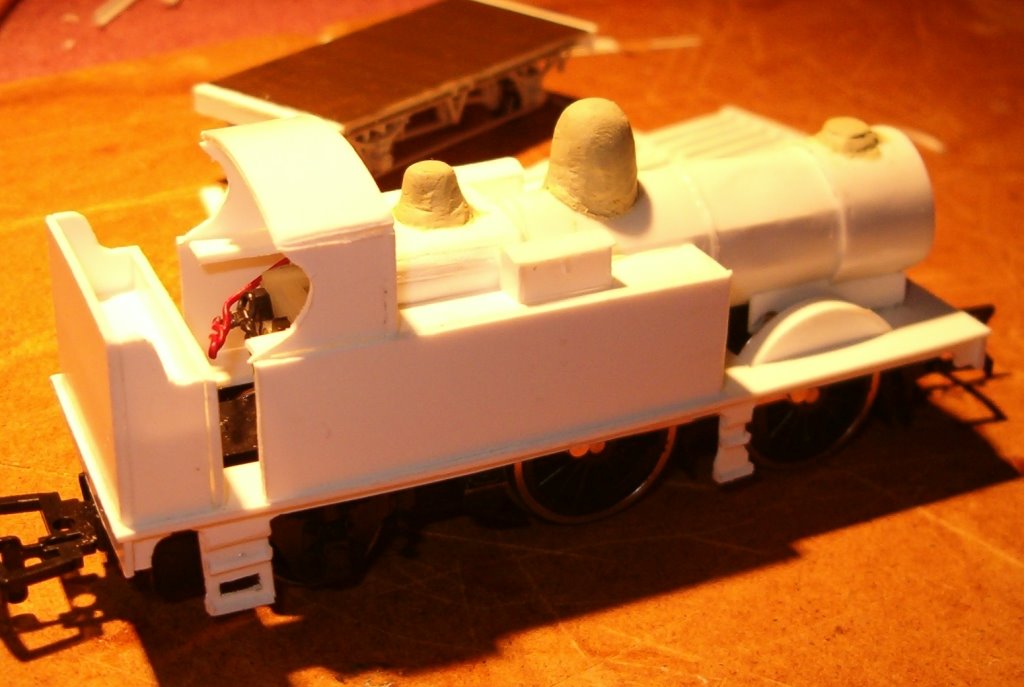
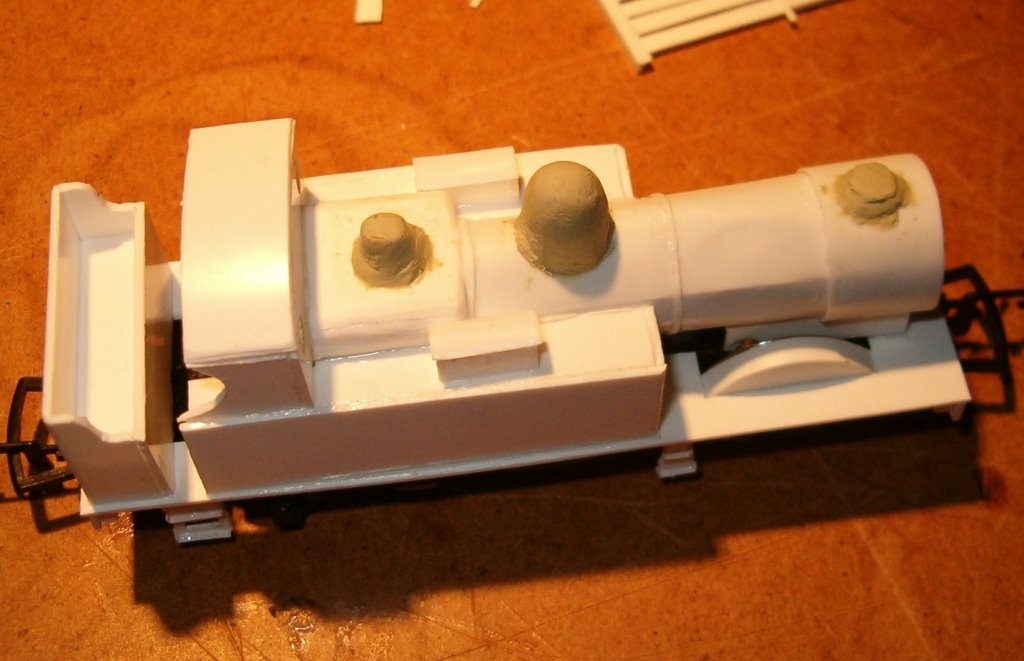
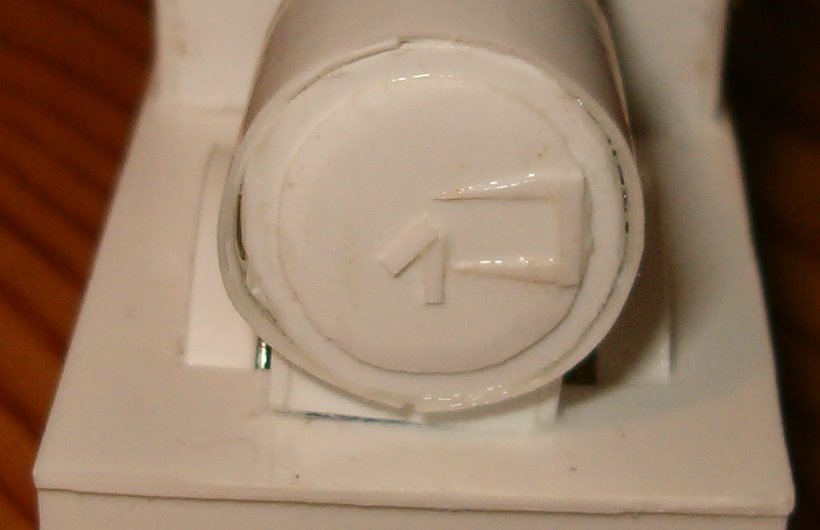
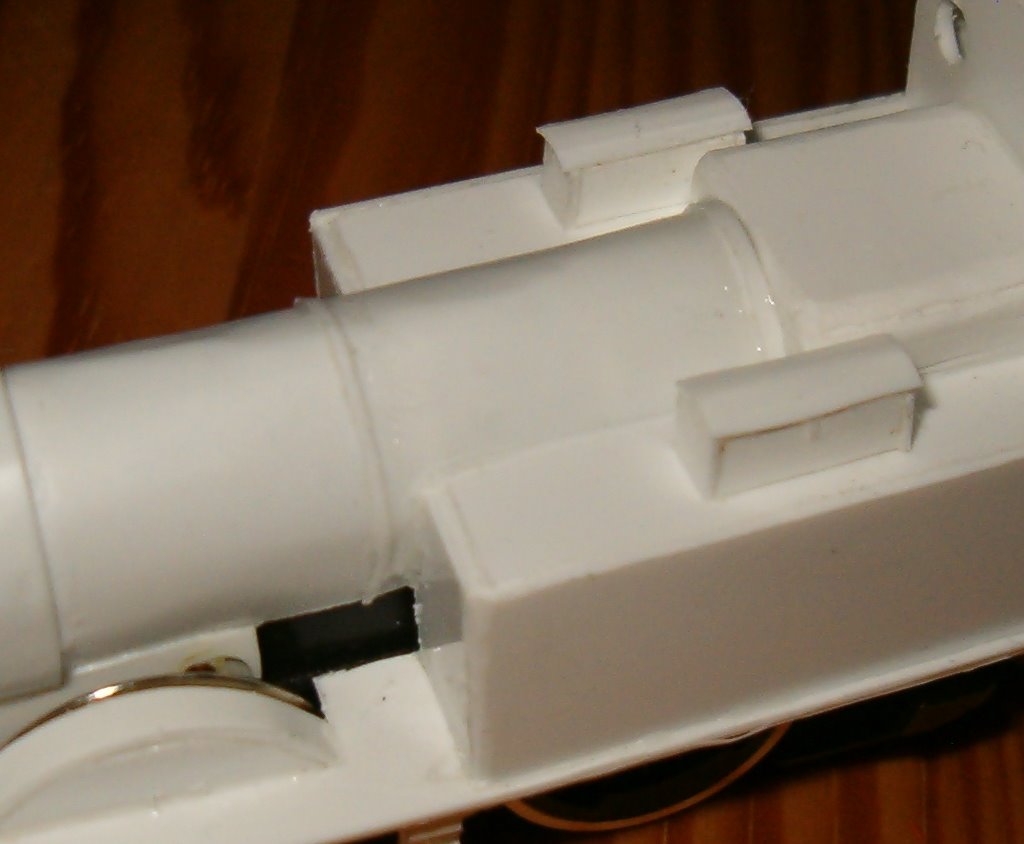
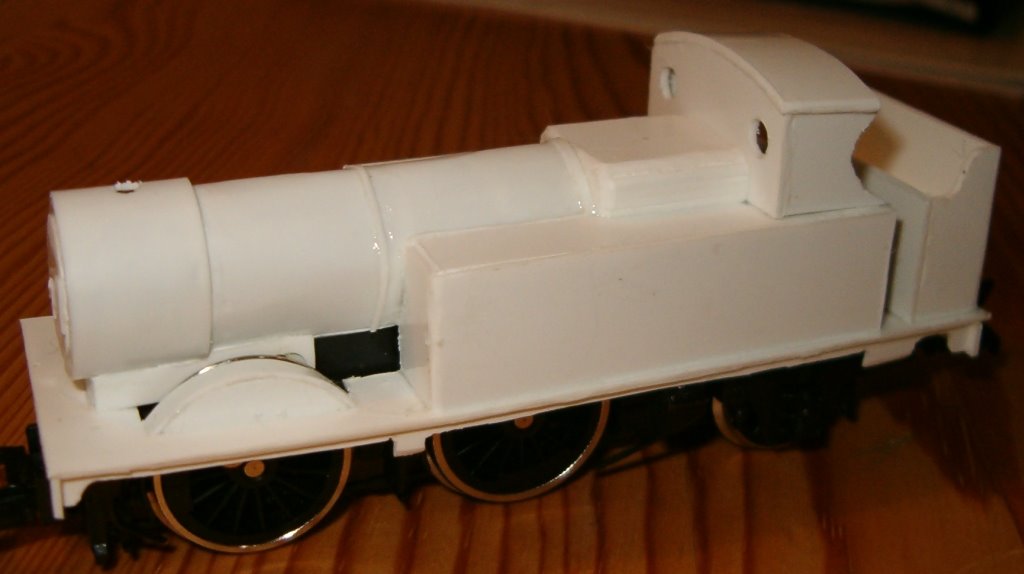
I wasn't happy with the boiler on the 517; I made it from two rolls of 20 thou plasticard, but it ended up with a lot of folds rather than smooth curves. For the 42xx, I used a single layer of 20 thou cut to the dimensions of the actual boiler, then two layers of 10 thou wrapped around the outside. This worked a bit better: the 10 thou is easier to bend, and can just be wrapped around the inner layer and glued. I then held it in place with a rubber band, reckoning that this would tend to force it into a circle, as opposed to clamping it which would try to make various bits flat and the edges more sharply bent. This was a partial success but the boiler still isn't perfect.

The 42xx boiler has one other difficulty compared with the 517: it's not a simple cylinder, rather the back half is tapered. Time for some 'O' level geometry! I won't reproduce the maths here (unless anyone is interested - if you are, please ask, it's not that hard). I drew the shape required on paper with a ruler and pencil, then cut it out and tried it. Then I pritt-sticked it to the plasticard (20 thou), and cut it out using scissors. (Incidentally, for 20 and 30 thou, scissors work far better than a knife; at 10 thou the knife cuts so easily it's not worth it, and at 40 or more the scissors won't work at all). A bit of glue, a while held in clamps, and I had a lovely taper boiler. For the outer layers, I just extended the arc that I had used for the inner layer. This probably isn't geometrically correct, but it worked nicely.

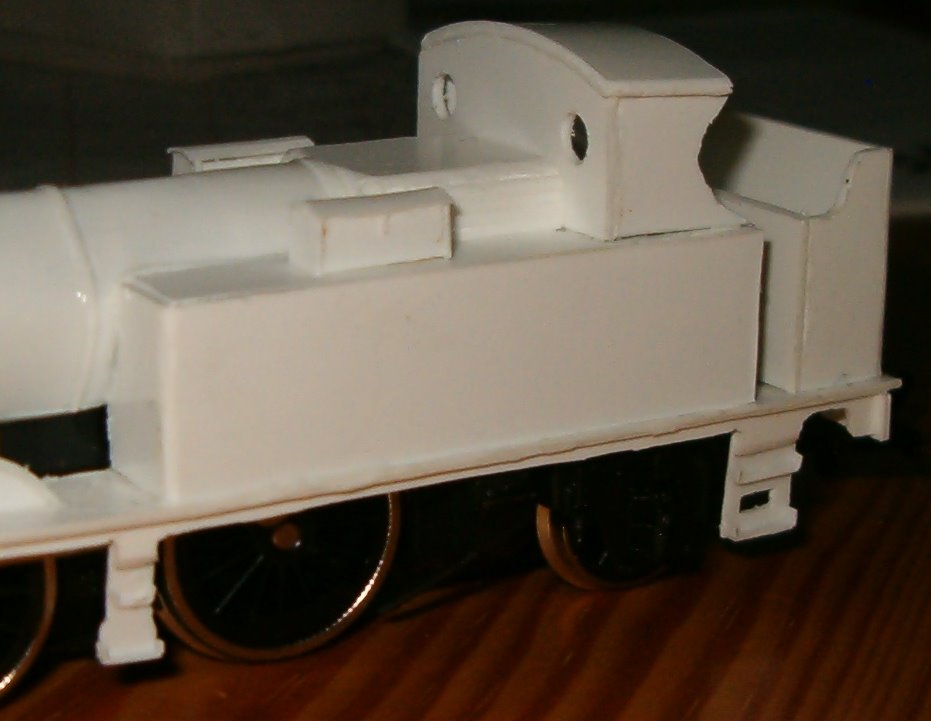
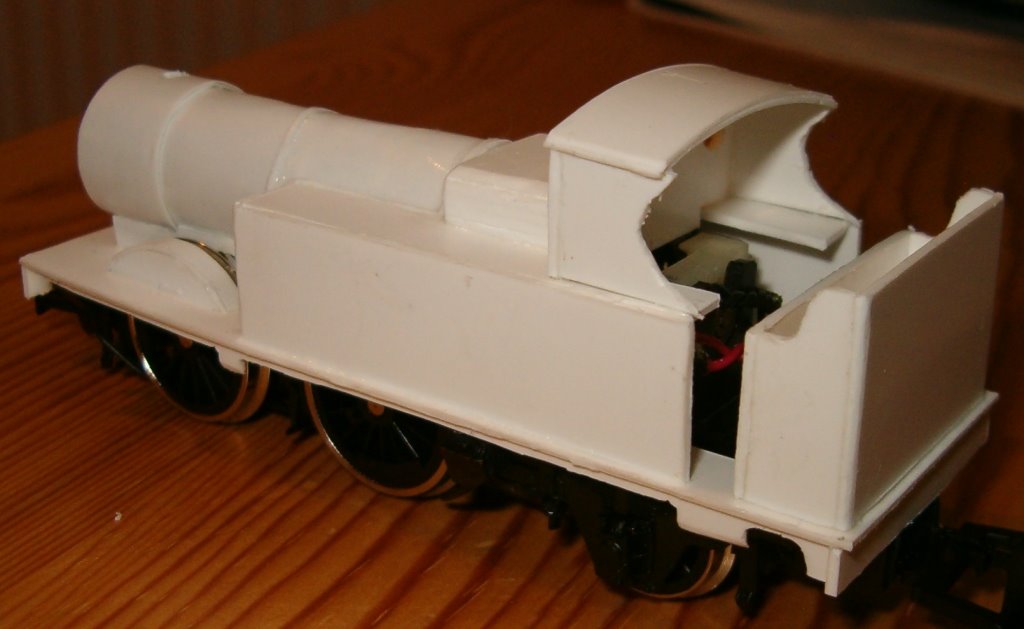
Next I built the tanks, starting with the tank front. I used compasses to trace the circular hole for the boiler, which worked very well; I used the cut-out circle to trace the curve of the smokebox saddle as well. The tanks have sloping tops. I had originally planned to build them from 60 thou plasticard (I just bought some), but ended up doing it as two layers of 30. I cut the outside using a scale drawing stuck on and scissors to cut out, plus a knife and file for the rounded corners. The inner layer was slightly shorter, the idea being that the tank top would fit on top of the inner layer and inside the outer. Cutting the top to fit the boiler wasn't easy (or particularly accurately done), but when I had, it slotted in place very nicely.

The only other difficulty on this part was a curved plate at the top of the smokebox saddle; I made this by sticking two squares of 10 thou plasticard to the bottom of the smokebox (and holding them in place with a rubber band).

More later, including pictures; I took some at this point but accidentally deleted them :(

Friday, May 26, 2006

Painting

I mentioned before that my painting technique needs work: look at the state of my first attempted milk wagon if you don't believe me. Now I've built a second milk wagon and a 517 class tank engine (earlier posts), so it's time to see if I can do any better.

I started this time by undercoating the whole of both models rougly using a Humbrol black aerosol. Amazingly, I've never used one before (apart from at the legendary "cosmic wheelbarrow" party when I was 18, where we re-painted a friend's wheelbarrow - blue with white cloudbursts and go-faster stripes - and the inside of his garage door). I was amazed at how easy and fast it was, and what a nice even covering it gave - I guess that's the point! The only glitch was at the front, where I held the can too close to the smokebox.


Next I painted over the tanks in green. Very nice! I had to stop before I'd done much more, but next time I had the chance I gave the tanks a second coat, painted all the black bits (smokebox, frames), the rest of the green (boiler etc), brass dome, chimney cap and valve covering, and red buffers. Alas, the effect wasn't quite so good at this point.


So last weekend I rubbed down all the bits with obvious paint drips with sandpaper - just enough to get rid of the drips and rough the surface up slightly. Then I gave those bits a delicate re-coating of paint. It's looking very nice now! It also has a slightly weathered look due to the sandpaper :) I'm currently undecided whether to leave it like that or add a little more paint to cover up the worst of the scratches.


As for the milk wagon, that was a much easier job: brown all over, except black for the brake gear and white for the brake handles (not yet done). The chassis needed two coats, but I hadn't sprayed it first. The body, chassis, and roof are still not attached, but it's nearly there now!

Friday, May 19, 2006

Milliput

My little engine is almost finished now. The only things it was missing was three small, round components: a funnel, dome, and safety valve cover. All too hard to make out of plastic.

The funnel by fluke I got as a spare from the local model shop (including the crucial screw which will hold it and the body on to the chassis). However it doesn't include the nice moulded bit at the funnel base.

I'm trying lots of new things here, so I thought I'd try to model the remaining rounded bits using some kind of resin. I was going to make a mould with plastiscene and pour something into it, but in the end I changed my mind and decided to use milliput because that's what I could find in town. It's sort of like plastiscene, only you mix it from two different coloured bits (like the chewing gum in Mission Impossible but less explosive) and it sets hard in a few hours.

I didn't like the consistency of it - a bit like dry clay. I shaped it roughly, rolled it, cut it with a knife, then wetted the knife to smooth the edges into shape a bit. This made the milliput a bit smoother, again, like clay. I took about half an hour making the three parts, then came back an hour or so later with the knife and smoothed them down a bit more. Now that they're dry I'll drill out the hole in the funnel base for the screw and put the funnel on.

The individual parts are no more crude than the rest of the model, but put in place they definitely help give the impression of an engine. I even took it in to show my wife when I'd put the three bits on, it looked that good :)

I'm planning to paint it next. Current thinking is I'll spray it all black, then paint over the top of it where needed (green body, brass dome etc.) Then I'll have to add lettering, and decide whether it's worth the expense of brass number plates (£4 for two little bits of metal!) I should also see if the chassis still runs with the body on it at some point - the motor is a tight fit under that firebox ...

Thursday, May 18, 2006

Building a better milk van

I've started a second attempt at my little milk van. I mentioned before that I was unhappy with certain aspects of it, specifically the lack of fit of the body and chassis :) So this time I started off with the chassis (the same one as before) and designed the body to fit on it.

First, though, the chassis needed a tidy-up. The floor had to be extended (with 40 thou plasticard) to match the lengths of the solebars, and I cut buffer beams from 30 thou plasticard. A bit of trimming and the ends matched up nicely ;)

From investigation, I decided that the "ironwork" on the sides and ends of the wagon should fit tightly to the outside of the floor and buffer beams. Thus the side planks should be exactly the same length as the wagon. I cut them first (seven of them), then stuck them to the corner mouldings. The sides are still 30 thou, I still can't cut straight, but the spacing is far better than before as I fitted them one-by-one using a sliver of 30 thou plasticard as a spacer. I also decided I'd have a gap just above floor level, as I thought it would look nice - I don't know if it's authentic, but I think cattle wagons have them, and it would help wash out spilt milk.

With one side built, I have started to put on the "ironwork" and door framing. This time I used 20 thou cut to 1mm widths (however inaccurately). The wagon has double doors which go from floor to ceiling. This surprised me slightly: I might have expected the bottom of the doors to fold down into a ramp, but my Siphon G doesn't do that and it would be harder to do so forget it ;)

More on this project when it happens.

Wednesday, May 17, 2006

Scratchbuilt engine (part II - details)

Time to add on some details. The most obvious omission at this point was a smokebox door. I tried to cut a circular piece of plasticard (40 thou) for this, but it came out a bit ovlate - ah well. Then I cut a second piece (thinner, I think, and smaller) for the door. I filed the edges and stuck it on. It was supposed to look like one part as on the model, but actually it looks like a separate door, which is probably closer to reality :) Then I cut hinges and keys from 10 thou plasticard and stuck them on. Not accurate, but not bad for an impression!

Next, the bands on the boiler (including the one which conveniently hides the gap where the boiler meets the firebox). Dead simple: cut a thin strip from 10 thou plasticard, curl around a knife, cut to length and stick in place.

Next I finished the steps - 20 thou backing stuck behind the bit I'd already cut on the side-bar, and 10 thou for the steps themselves. The steps are u-shaped, but made out of a single piece: I measured the width including sides, gently pressed in a knife to create lines where I wanted it to fold, then cut the individual step depths and folded them and glued them to the back. Nice!

Then the two toolboxes on top of the tanks (at least in the 517 pictures I've seen - that's a difference from the 14xx). These are cut from 40 thou plastic with rectangular fronts and arched sides; the roof is 10 thou (single thickness), rounded using the blunt side of a knife blade. The lock is a tiny sliver of 10 thou card - well, I like it anyway :)

This is how far I've got now. My next efforts have to be the funnel, dome, and safety valve cover, which hopefully I'll post when I've done them :)

Scratchbuilding an engine (first attempt)

In an earlier post I mentioned three spare chassis which I'd got working. What do I do with them? Well, why not build an engine to go on one? I thought about a large-scale Skarloey (from Thomas) but the wheels weren't quite right. So I thought I'd try to build a model of the 14xx's predecessor, the "Wolverhampton 517 class". It could be largely a copy of the 14xx, but with a few different bits where needed. Once again this would mean I had a real 3D prototype to work for most of the time. I've never scratch-built an engine before, but I have the chassis and plastic sheet is cheap, so how far wrong can I go?

First I measure and cut the floor. This was a rectangle of 30 thou plastic with many bits cut out to fit on the chassis. I actually wanted to use 40 thou, but picked up the wrong sheet :( Next I cut the sides to go beneath it (in the hope of adding some strength). This was also long and complicated to do, as I cut the two tops of the ladders out of the same piece. Sticking these to the top did stop it bending quite so easily. Buffer beams next, simple rectangular ones which nicely stuck to the top and sides.

At this point I had a flat platform which I could put on my chassis. Woohoo. A lot of work and not a lot to show for it. What next, I thought?

Next, I decided to do the smokebox saddle. This was carefully measured and then inaccurately cut and glued together to make a 3-sided open box. I then made the smokebox itself. This was two rectangles of 10-thou plasticard, rolled into a cylinder, with joins on opposite sides, and glued together. I'd used a similar trick for roofs, but it doesn't work so well on cylindrical objects. Thankfully it fitted nicely onto the saddle I'd already made.

Giving up on the front for a bit, I cut the bunker out of 40 thou card - nice and strong. The 517 had a straight-backed bunker, so this was very easy to do - only the s-shaped curve at the top of the side caused trouble, and I tidied that up with a round file. The bunker is a simple box, so I cut two rectangles to go inside (one at the bottom and one half-way up) to give it strength. The result looked pretty good and felt very strong indeed.

Up until this point I'd worked with two different chassis, the old Airfix one and a newer Dapol one. At this point I realized that I had to reject the older chassis, as its larger motor extended back into the cab so far that I couldn't fit the bunker on. No problem, the newer chassis had a smaller motor which fit fine.

Next I cut out the tanks, using 40 thou for strength. This was quick and easy to do as everything was rectangular; I rounded off the corners with a file, then had to cut a circular hole in the front for the boiler.

Next I built the boiler itself, using the same method as for the smokebox. It slotted into the smokebox, which has a slightly larger diameter (convenient for modelling). It also slotted into the hole in the boiler, although unfortunately I'd cut that a bit too small and not quite circular :( But when I put the boiler, the firebox, and the tanks together and stuck them to the chassis, something magical happened - it started to look like an engine! I then had to cut out most of the underside of the boiler and part of the smokebox to allow the chassis to fit into place. This was a nervous time as I thought it would fall apart - but no, it seemed still pretty solid. I cut some three arc-shaped braces to go inside the boiler just to be sure.

Next I built the cab. I had two goes at this, as the 517's cab is different from the 14xxs and I didn't have a diagram. The first one was too small, the second one looked much better. I'm still struggling to cut nice flowing curves, though.

That left a big gap where the firebox should go. This is an awkward shape, with two broad rounded corners and a rounded edge at the front too. In the end I made it out of a big lump (5 40 thou rectangles) and just filed it to shape - clumsy, low-tech, but not bad.

More to come.

Monday, May 15, 2006

Handrails

Back to the little tank engine. After the roof, whistle guard etc., it sat forlornly for a few weeks while I worked on other things. "I need to finish this," I thought, so I started to work on replacing the handrails. They're very simple: made from the core of a single-strand plastic wire (large roll from Maplin) - the same wire I used for the whistles.

I drilled out the holes in the body where the old handles went (with a tiny drill bit held in my fingers, as I have bits but no drill - my wife's idea and far more effective than it sounds). Next I cut and bent the wires to shape and stuck them in. Not bad, not brilliant. The one which goes up onto the roof gave a bit more trouble because of the angles.

I now have to decide whether to remove these handrails and try to make "knobs" out of blobs of solder for them, or to keep it as it is. I suspect the latter course will win out, in which case all I need to do is take the body shell off and bend the wire ends a little so they can't come out. That, and maybe paint them a dirty black colour, but again I doubt I'll get around to it.

But still before I can finish the engine, I need to stick on the whistle guard and whistles (which I'll probably have another go at) and fix a missing buffer. That'll probably take another couple of months to get around to.

Scratch-built milk van

After my "success" in building a new roof for the 14xx tank engine, I thought I'd try to build a wagon from scratch - specifically, a milk wagon with slatted sides (for milk churns, used in the days before glass-lined tankers). Why? Because they look nice!

So first, the prototype. The GWR had an 18' 4-wheel milk van (Siphon B) but I couldn't find a picture of it. So instead I've taken my cue from Thomas the Tank Engine, specifically the story about Daisy the diesel railcar in the book Branch Line Engines.

I started work with a scale drawing. The overall size was based on a GWR mogo van (I had one handy). I figured 3mm for the slatted sides with 1mm gaps; that's 9 inches and 3 inches in scale, which is probably about right.

The entire body is made of 30 thou plastic card, except for the corners. I used a v-shaped moulding for them, for strength, but after more practice I'd probably make my own in future. I used a steel ruler to cut the planks, with dubious accuracy. The "metal" braces are also cut from plastic card; in theory they're 1.5mm wide but there's a lot of variation!

I started by sticking the horizontal strips to the corners (resting the sides on another sheet, as the corners are wider than the thickness of the sides). Then I had great fun marking off where the vertical door edges should go, then laying a strip across diagonally and cutting it where it met the edge of the door / roof / floor. I layed out the planks for the ends and put the end bracing on, then stuck them to the corners / sides. (This wasn't entirely satisfactory, as the planks weren't quite straight somehow).

Next came two half-moon sections for the ends to support the roof, followed by the roof itself, made from two 20-thou rectangles curved by wrapping around my knife handle and glued together. At this point I had a very nice van body.

I wasn't going to attempt a chassis myself, but conveniently I had a kit for a CooperCraft 11' wheelbase chassis, so I made that up. It turned out that I should have thought more about this in advance, because when I came to put the two together, they didn't really match for size. With hindsight, rather than cut the bracing on the sides off scrupulously at the bottom of the lowest plank, I should have had it carry on to the bottom of the thickness of the floor - and worse, I should have measured it so that the floor matched up with the planks rather than being about 1mm wider! But it's a first attempt.

Putting that off for a while, I decided to paint the body. This was the next big problem: the paint just didn't go on very well, both the brown for the sides and the grey for the roof.

So I now have a chassis and a ropey-looking wagon body which doesn't fit it. I think my next step will be to abandon the body and build another one, only this time the right size to fit the chassis (whatever that is). I still need to think about buffer beams too, as the chassis didn't have any.

But I have good reasons to think I'll do better next time:
- More practice cutting the plasticard
- I'll measure it properly next time
- I might use 20 thou instead of 30 thou for the sides, or perhaps a mixture (easier to cut accurately, but weaker - not sure about this one).
- I'll try spray-painting the sides and roof with an undercoat (black) first in the hope that the paint goes on a bit better ;)

That was actually two weeks ago (I'm a bit behind on blogging this) but I might start the new body this evening as I've reached a pause in my next project - to be described ...

Wednesday, May 10, 2006

Fixing Electric Motors

I mentioned earlier that I had a Great Western autotank (14xx) which didn't work. For one reason and another I also had three more chassis for the same engine in the loft - and two of them didn't work either. I could have replaced the chassis with my one remaining working one, but first I thought I'd see if I could fix it.

I'm not afraid of taking trains apart now, having done it a few times in the past. Electric motors tend to be pretty robust, and it's usually possible to get them working again with a bit of oil and polish. I remember making one in physics at school, it went pretty well and I spent most of the lesson tweaking the brushes to get it to go around faster ... but I digress.

This type of engine has a small screw inside the funnel which holds the chassis to the body (queue request to borrow my wife's precision screwdriver). More screws then hold the motor (back) and front block (containg the worm gear) to the chassis proper. I took it all apart, cleaned the brushes and contacts on the motor, put some current over it, and it spun like mad. Put it back in the engine and nothing happened. So I put WD40 on the joints (WD40 is magic and smells fantastic too). Still nothing. Then I gave the contacts which pick up electricity from the wheels a clean and oil, and now the engine runs. I think it needs a bit of a decent run-around and it should go fine.

A week or two later, feeling on a roll, I got the other two chassis down from the loft and took them apart too. On the first one, the motor worked, but the wheels wouldn't turn, even when turning the motor over by hand. I thought it might be an axle problem, but when I took the worm gear and motor off the chassis ran fine. The motor ran fine too, so I took a look at the worm gear, and it turned out part of the metal thread was bent out of position. I bent it back with a fine screwdriver (nothing like having the right tool for the job!) and put it back together. Success! This was very satisfying as I'd tried and failed to fix the same chassis a few months earlier - I've clearly learned something in the meanwhile.

So the next day I set to work on the last "dead" chassis. As with the others, the motor by itself spun nicely. However when I took it apart it was missing a spring that provided a contact between the motor and the pickup. I didn't have such a spring handy (funnily enough) so I got some kitchen foil to improvise. I wound the foil around in a roll, then wrapped it around with masking tape (it passes through a hole in the metal chassis which is connected to the opposite polarity). I put the foil plug into the hole, pushed in the motor, fastened the screws, and tested it. No problems! A quick clean for the contacts and all my chassis were working again. That left the question, what do I do with three spare 14xx chassis? But more about that in a future post.

All very satisfying - a bit like bug fixing (I work in software), but working with physical things makes a pleasant change.

I'll try to add some pictures of this later as it will make more sense.

Two more current projects I'm working on and hope to write about soon. First, a scratch-built slatted-sides milk van wagon which I'll pretend is a GWR Siphon B although it's actually based on the one in Thomas the Tank Engine; and a scratch-built GWR 517 class tank engine built to use up a spare 14xx chassis.